The dreaded “end-of-the-month” reconciliation cycle—chasing defaulters, scrolling through endless M-Pesa SMS alerts, and fixing human errors on a bloated Excel sheet.
For a successful welfare the following are always a priority:
1.Transparency and Trust
Trust is most important for any welfare program. If contributors do not know where their money goes, or if beneficiaries feel the process is unfair, the system breaks down.
- Clear Policies: Establish objective, documented criteria for who qualifies for aid and how much they can receive.
- Open Auditing: Publish regular, simplified financial summaries showing funds received, funds spent, and current balances.
2.Speed of Delivery
Welfare emergencies such as medical crises, sudden bereavement etc. do not wait for monthly board meetings.
- Streamlined Approvals: Create a fast-track approval process for urgent cases.
3. Active Communication and Engagement
Welfare should feel like a community safety net.
- Feedback Loops: Regularly survey members to find out if the welfare benefits align with their actual needs
- Real-time Tracking: Use reconciliation tools like Nobuk collect to track every single contribution.
Once that is done you can now create a collection with Nobuk collect and here are steps on how to collect for your welfare:
Step 1: Create Your Welfare Collection
Begin by registering for new sign ups and log in if you already have an account on Nobuk platform.
Once done click create collection.
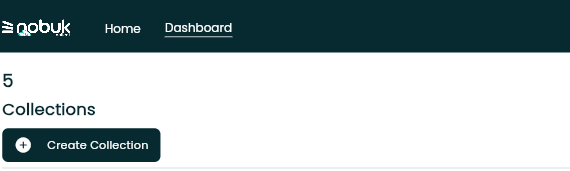
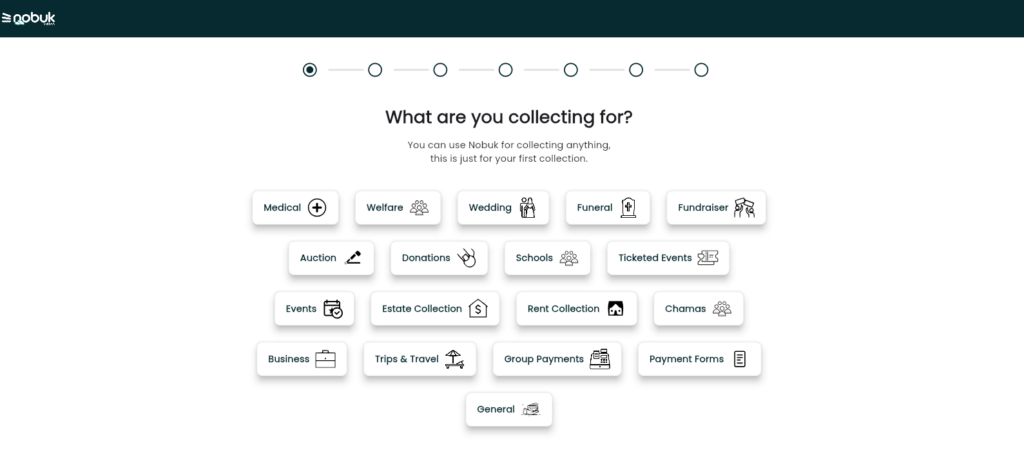
Select the welfare template.
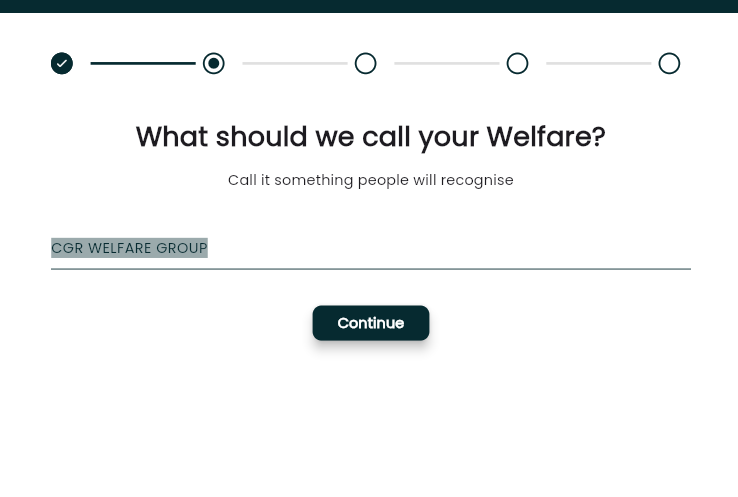
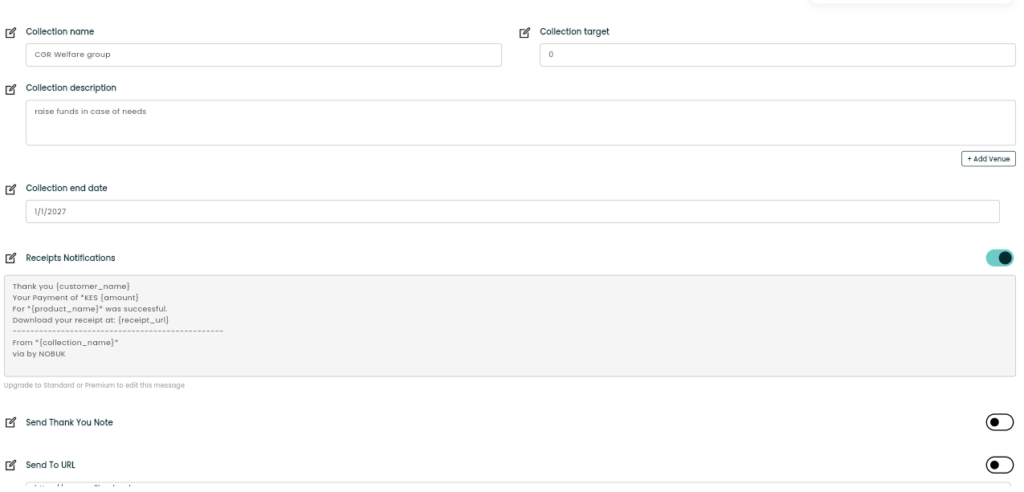
Give your collection a clear and meaningful name that immediately identifies the project, for example CGR welfare group. A descriptive name builds awareness every time the collection is shared
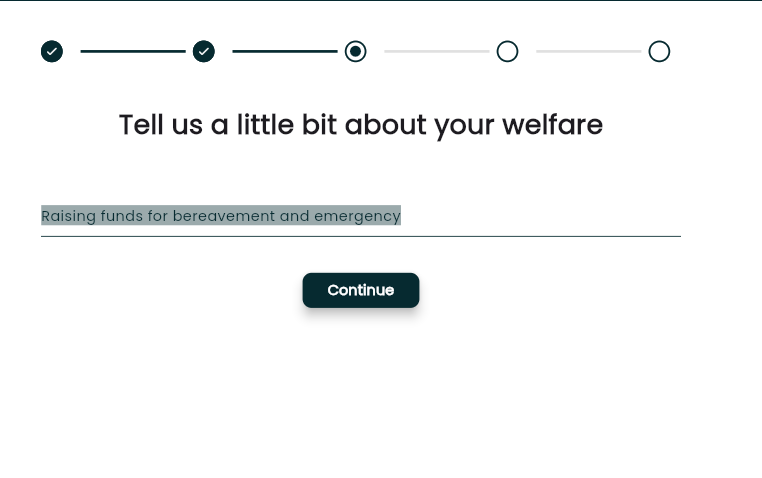
Add a brief description. Explain why welfare is needed or the course it will support
Next you will add the payment details either Till Number, Paybill, or Bank Account. Nobuk is a non-custodial platform, meaning all contributions are sent directly to your designated account.
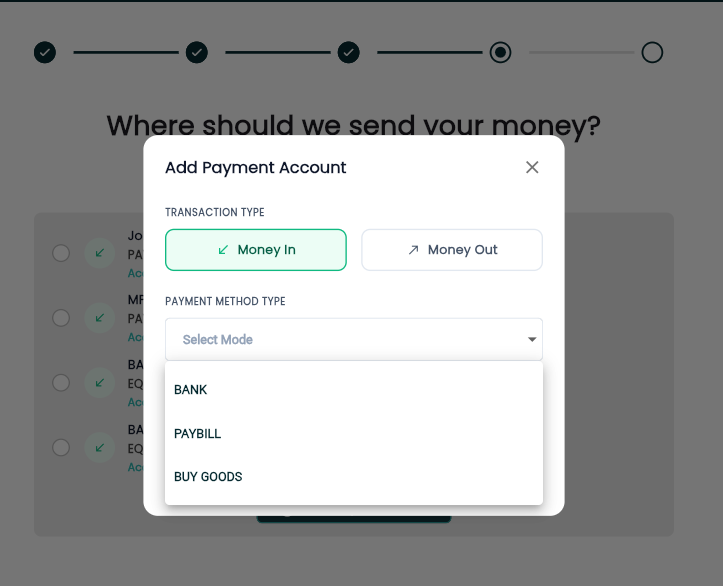
You can make a test payment to verify that the payment process works correctly before launching the campaign
Step 2: Customize Your paylink setting Page
Open Paylink Settings.
Begin by creating Payment Categories. These help organize your collections and provide better reporting. For example, you can create categories such as:
– Welfare Contributions
– Bereavement Support
– Fines
Simply enter each category, separated by commas.
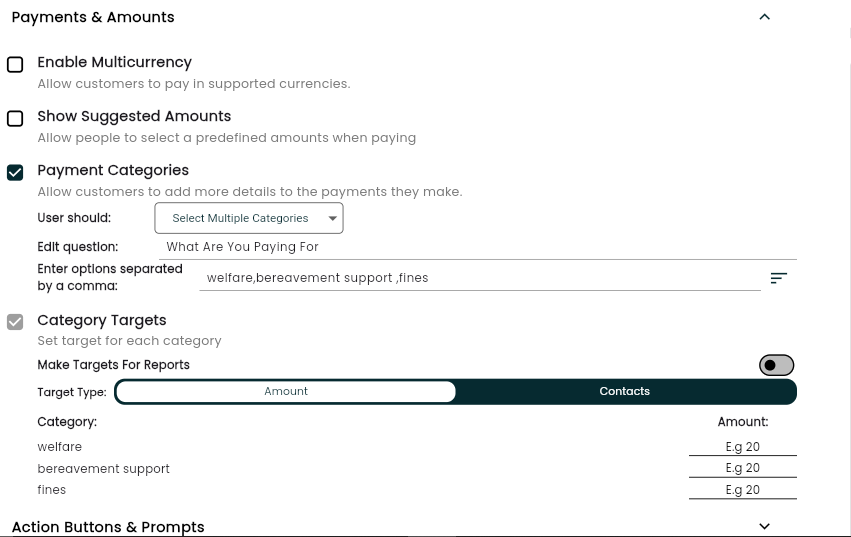
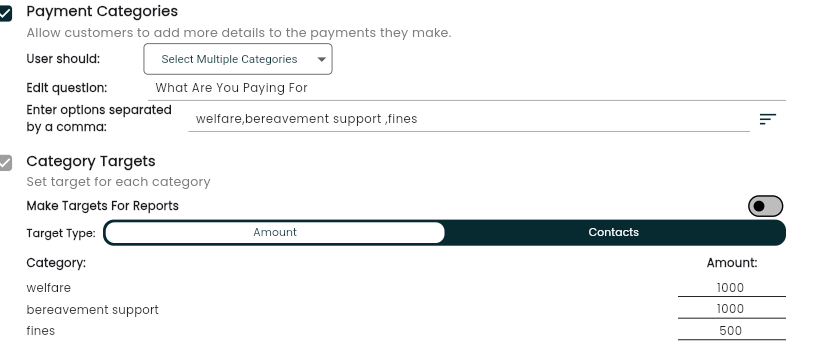
If a category has a fixed contribution amount, you can assign and lock that amount by setting a Category Target.
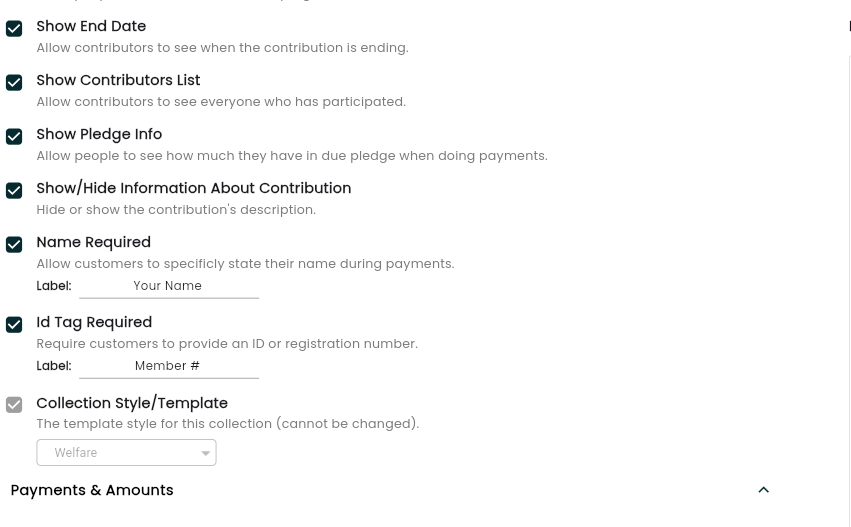
To improve member tracking, enable the ID Tag feature. This allows contributors to provide additional information, such as their Membership Number, making reconciliation much easier.
If you’d like members to monitor your progress, enable the Progress Bar. Seeing the collection move closer to its target often encourages more participation and sharing.
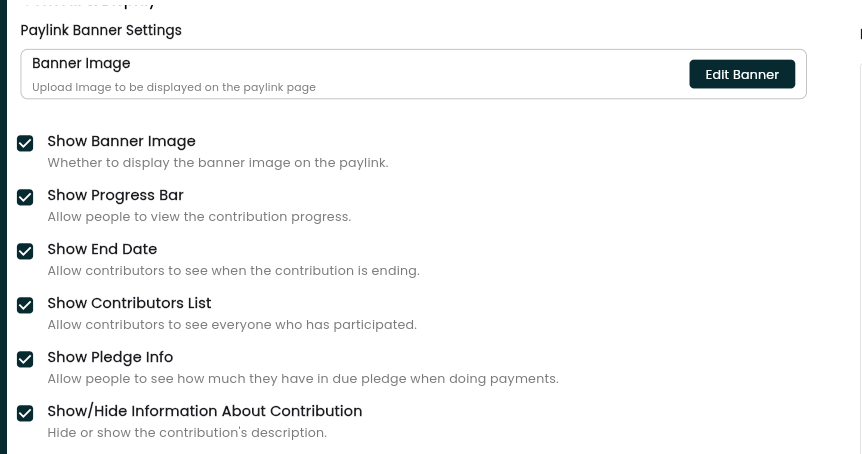
If you’d like members to make pledges with the link you can toggle the pledge button on
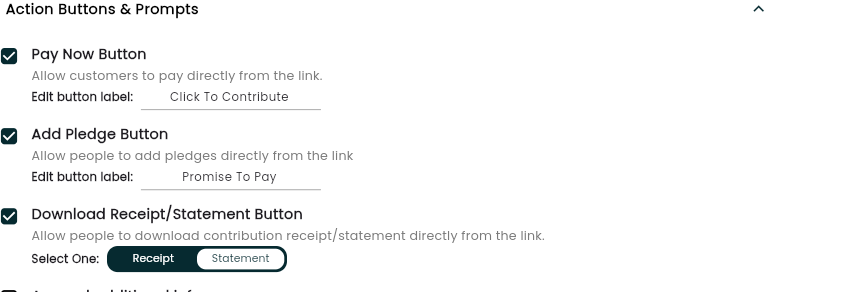
Once you’ve completed your customization, click Save.
Your collection is now ready to share.
Click Share Paylink to send your payment link or QR code via WhatsApp, email, SMS, or any other communication channel, allowing members to contribute in just a few taps.
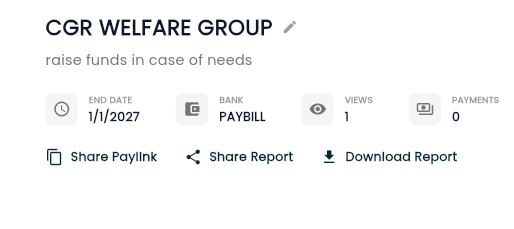
Step 3: Automate notifications and reports
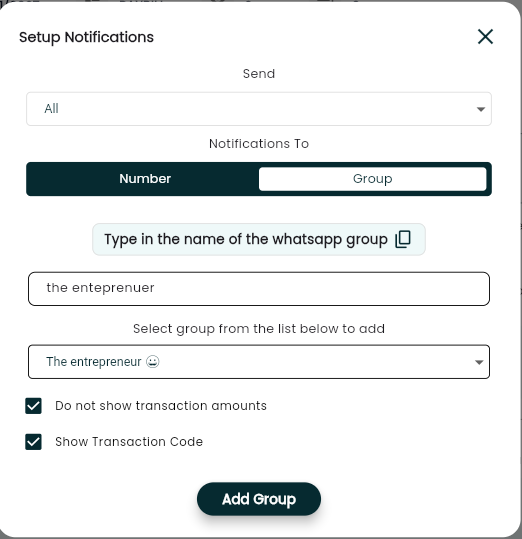
Open WhatsApp Settings and click Start Setup.

Activate the WhatsApp Bot. Then, on your phone, open WhatsApp, navigate to Linked Devices, and scan the QR code displayed on your screen.
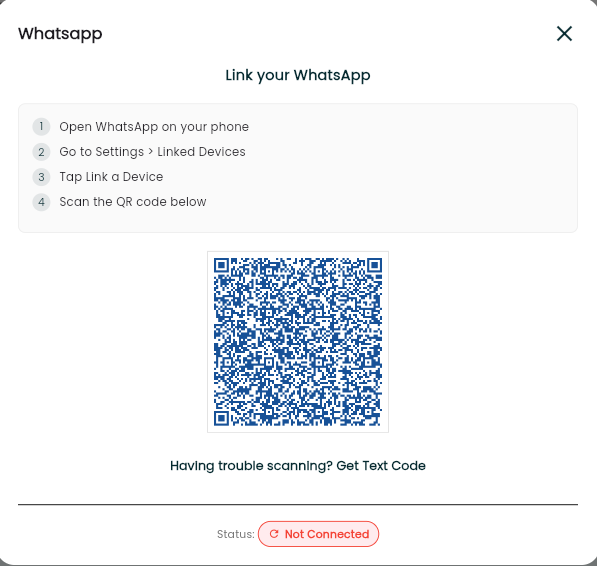
Once connected, click Add Group and select your welfare WhatsApp group.
Next, choose the information you’d like to share automatically whenever a contribution is made. This can include:
– Contributor’s name
– Amount contributed
– Payment time
– Transaction reference
Every contribution is posted instantly to the group, keeping everyone informed in real time without requiring manual updates.
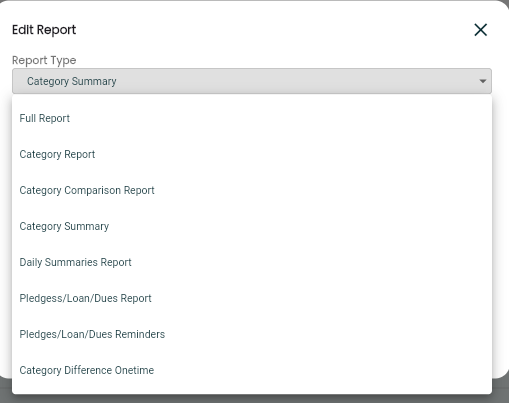
You can also automate summary reports by enabling Automated Reports and scheduling them to be sent daily, weekly, or monthly and time for your own preference
Step 4: Pledge and reminders
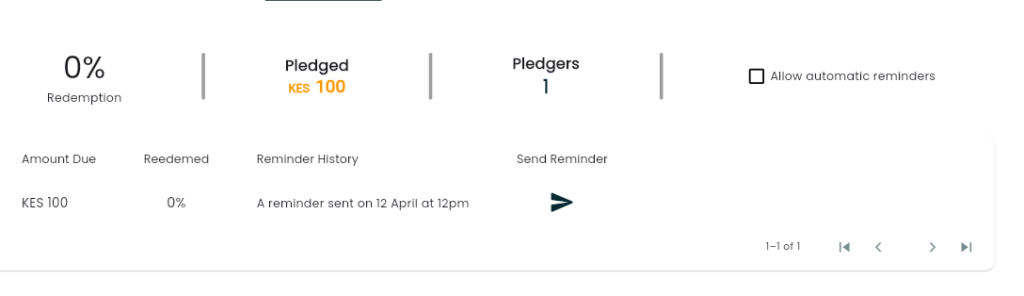
If you have allowed members to make pledges, Nobuk allows you to send reminders to pledgers
Here are some few steps on how to do that:
- Click on Send Reminders on the bottom right of the screen
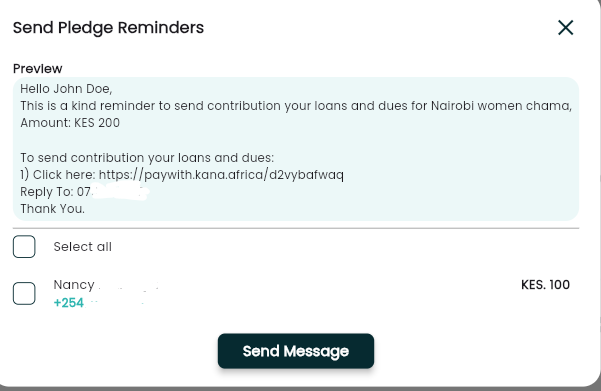
- Send Reminders pop out will appear with the following details:
Ø A preview message will appear with the following content {pledgers name, collection name, amount, payment mode, senders contact}
Ø Ability to select all the pledgers you wish to send reminders to
Ø A send message button, that will send the message to the pledgers
The pledge message will be sent to the members contact
Step 5: Thank Every Contributor Automatically
Instead of sending thank-you messages individually, Nobuk can send them automatically.
Open Collection Settings and enable Thank You Messages or Receipt Notifications.
Each successful contributor will immediately receive a confirmation message. This assures them that payment has been received and appreciates them for their support.
By streamlining payments and reducing manual processing, nobuk Collect makes fundraising and financial management easier and more transparent for communities.